Best Tips For Building A DIY Backyard Greenhouse For Cold Weather Climates

Most of us backyard gardeners dream of one day adding a greenhouse to our space. I definitely did! And then I made that dream a reality but building a DIY backyard greenhouse for cold weather climates. But before building our now greenhouse, we learned a lot of lessons, including what you shouldn’t do.
This post covers the best tips for building a backyard greenhouseI learned along the way to ensure you don’t make the same mistakes I did.
Best Tips For Building A DIY Backyard Greenhouse For Cold Weather Climates

You’ve likely scrolled past hundreds of beautiful greenhouses on Pinterest, dreaming of one day seeing one of them in your own backyard.
But here’s the honest truth…
A lot of those gorgeous glass greenhouses you see online are NOT built for cold weather climates or Canadian Winters.
In order to successfully build a DIY greenhouse you can not only grow beautiful, productive plants in but will also hold up throughout harsh Winter weather, there’s a few key things you need to consider.
But first….you might be wondering “why should I trust your advice?”
Let me tell you. Over the last five years, my husband and I have built two DIY backyard greenhouses on our southern-Manitoba property. Yes, two!
Through a lot of trial and error, we’ve learned a few things about what you should and shouldn’t do when building a DIY backyard cold weather greenhouse.
So I do have some credibility and have gathered my best tips for building a DIY backyard greenhouse for cold weather climates to share with you!
But first, if you’re thinking you want a greenhouse but don’t have the time or desire to build a DIY greenhouse, I have the next best option for you.
What Is The Best Greenhouse To Buy For Canadian Winters
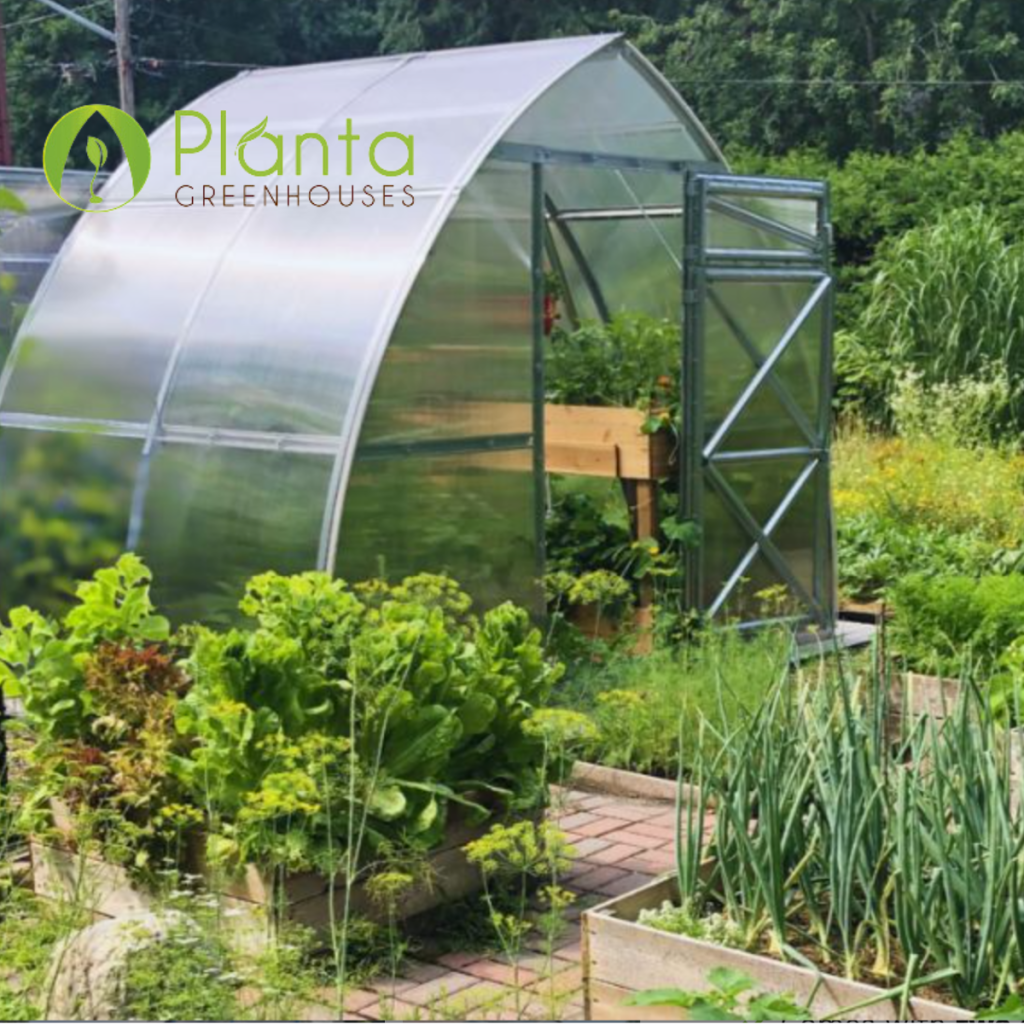
If you’re looking for the best high quality greenhouse to buy here in Canada, let me confidently suggest Planta Greenhouses Canada.
Planta Greenhouses offer a range of heavy-duty greenhouses that are weather resistant to harsh Canadian Winters and come with a 10+ year warranty!
I know many Canadian gardeners who own a Planta Greenhouse and are thrilled with the quality of the galvanized steel frame and 6 mm double-wall polycarbonate panels.
You can choose from one of many sizes of greenhouses, including The Sungrow 26ft, The Sungrow Urban (smaller backyard model) or The Alpine models designed for commercial gardening.
Planta Greenhouses also sells a 2-in-1 Phoenix Greenhouse Heater & Cooler, which we have for our greenhouse and love! It works great for keeping our greenhouse warm in the early Spring when seedlings are germinating.
And if you’re still thinking of going the DIY route, Planta Greenhouses sells all the supplies you’ll need, including automatic roof vents, polycarbonate sheets for your greenhouse walls and shade cloth.
Okay…now let me start by telling you all about our first greenhouse!
A Look At Our First DIY Zone 3 Greenhouse
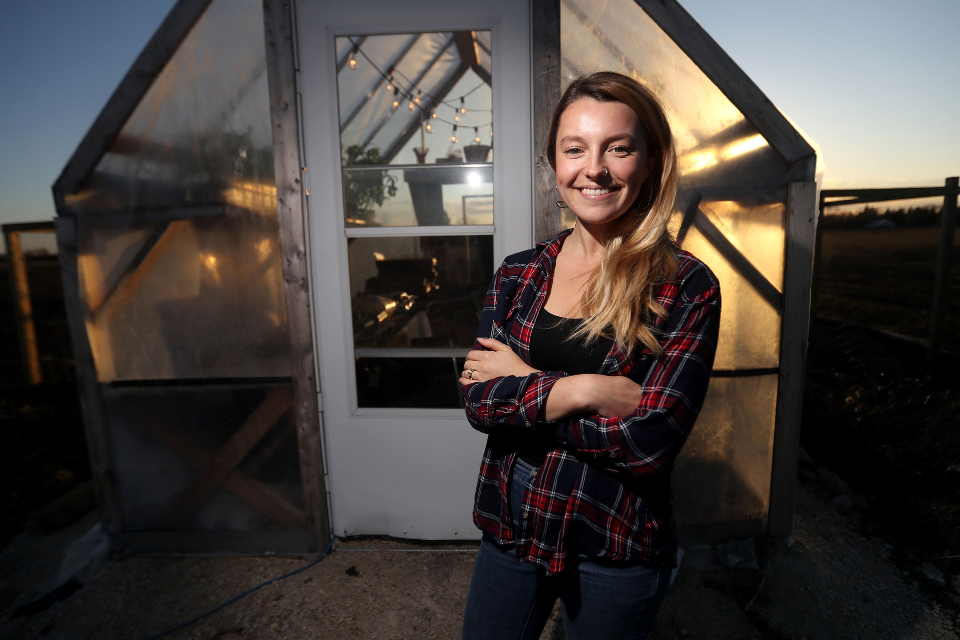
Our first backyard greenhouse was about 100 square feet in space. We built the frame out of treated lumber, added a window in the back, a screen door in the front and then wrapped the entire thing in greenhouse poly.
Sounds like a pretty typical greenhouse design, right? We thought so too!
And this first greenhouse actually worked really well the first Spring we had it.
By March it was hovering around 15-20°C during the day and not dipping lower than 5°C over night. It was an ideal temperature for our seedlings we had started indoors. We brought them all into the greenhouse to begin hardening off before getting them outside in the garden.
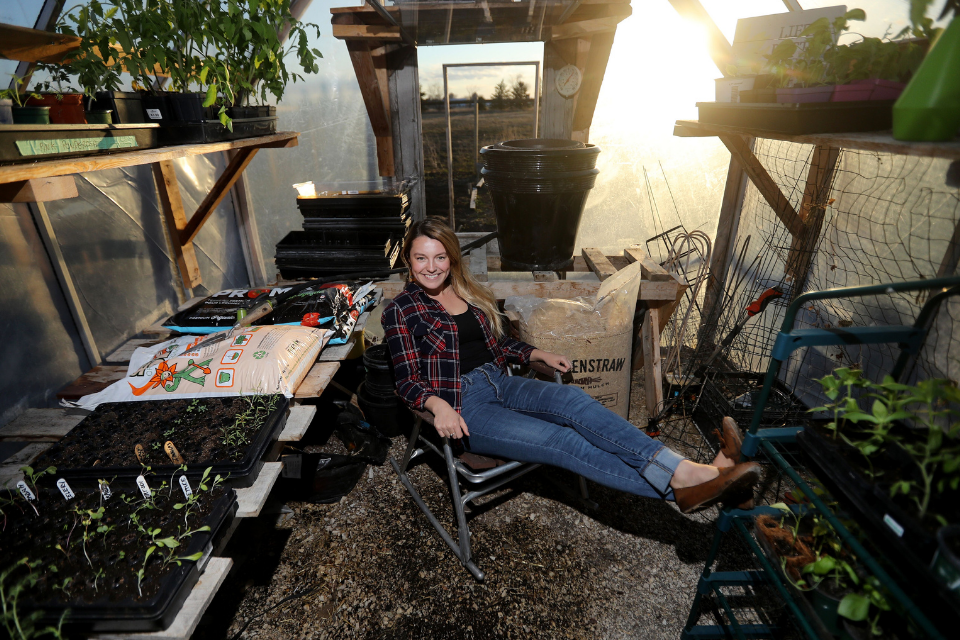
But then Summer rolled around and we quickly realized our poly-frame greenhouse was in fact just a hot box…
If it was 20°C or warmer outside, our greenhouse would be absolutely sweltering inside, basically frying our plants.
The small window and screen didn’t allow for enough heat to escape. Plus, the small space really didn’t allow for much air to circulate.
Though we did successfully grow some tomatoes and cucumbers in there over the 3 years we had this original greenhouse, it didn’t really fulfil our dream of growing food past the typical Zone 3 growing season.
Quickly our little poly greenhouse just became more of a storage shed for garden gear.
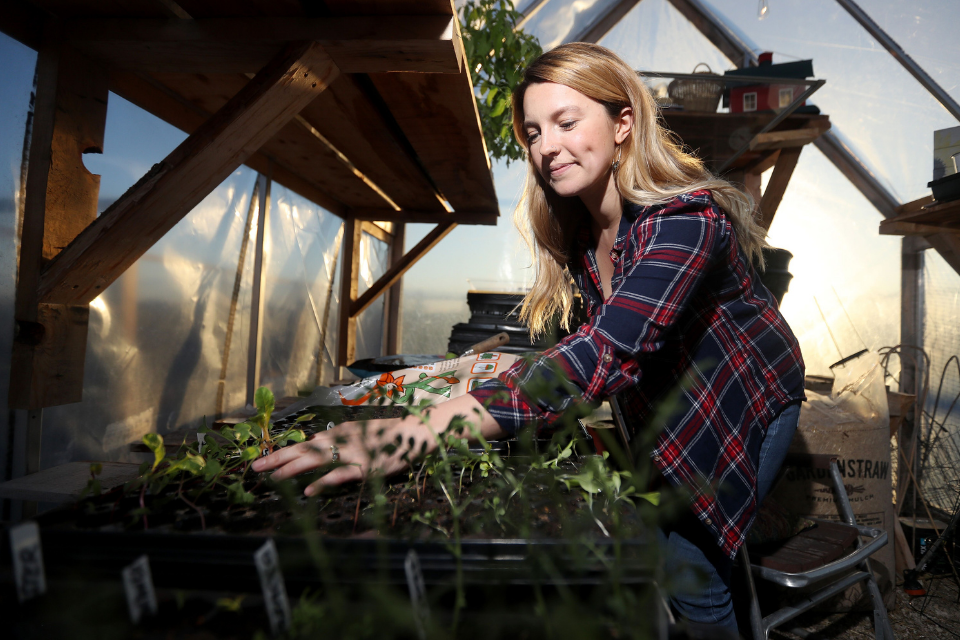
I know these photos (taken by the Winnipeg Free Press for a feature they did on The Grow Guide Podcast!) make that greenhouse look like nothing’s wrong. But don’t be fooled!
A lot was wrong with our first DIY backyard greenhouse.
Mostly because we didn’t really know what was needed to grow food in a greenhouse during all four seasons in a Canadian climate.
But we lived and we learned (cheesy, but true) and gathered everything we learned along the way to inform the build of our new greenhouse.
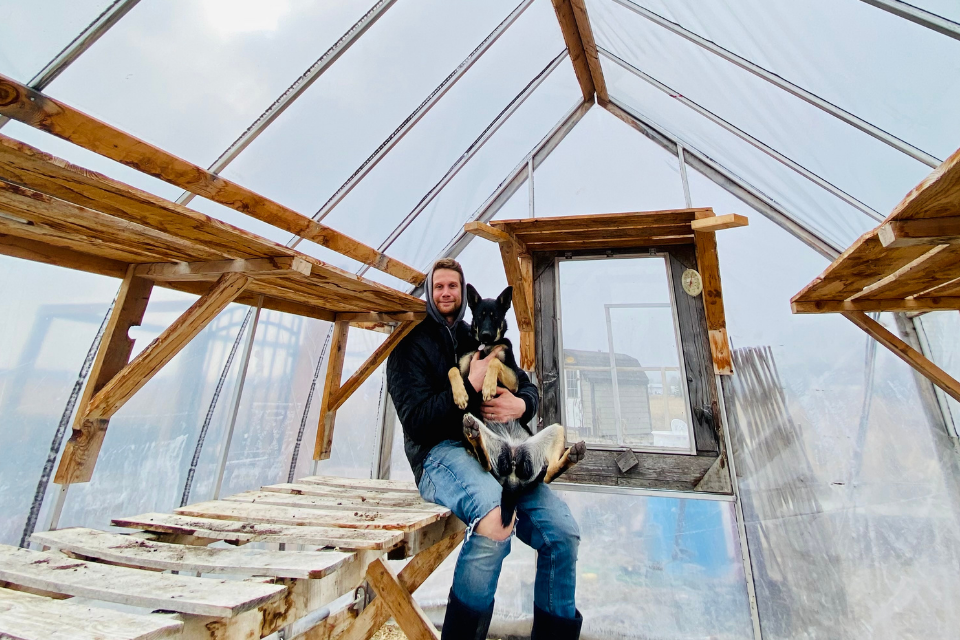
So in the Spring of 2021 my husband Justin, our puppy Pepper and I tore down our first greenhouse to make room for a new and improved one!
Pictured here is the last photo I have of our original greenhouse before we tore it down (*sad face*). We ended up saving the poly for future cold frames we’re hoping to build.
We had very clear intentions and objectives going into building our new and improved greenhouse. I liked to call it our Dream Greenhouse.
Key Goals For A Zone 3 Greenhouse
- Extend the growing season into Spring and Fall, ideally using our greenhouse to grow food in from March to November.
- Have easy access to water and power in the greenhouse for fans, hoses, heaters, etc..
- Build a space that will suit our growing needs for the next 10 years while also being big enough for us to spend time in, have dinner, hang with friends, etc..
- Build a structure that is strong enough to withstand the strong winds, snow falls and storms we often experience on our rural Manitoba property.
- Utilize natural sunlight to heat the greenhouse as much as possible and use materials that will keep heat in while also allowing air to move through.
*Note: If you’re planning to start building your own DIY greenhouse, I encourage you to first make a list like this of your goals and objectives. It will help ensure you’re customizing your greenhouse to your exact needs and to suit your grow zone.
A Look At Our NEW Custom Backyard Greenhouse For Cold Climates
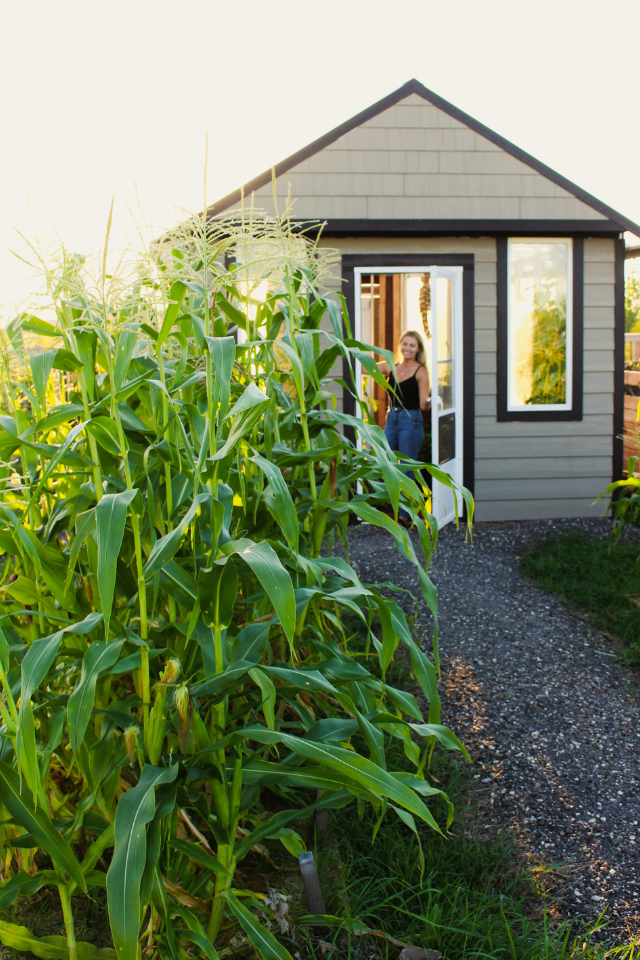
We built our new and improved greenhouse by first welding an aluminum frame. My husband is a welder by trade, which allowed us to construct our greenhouse this way. I know this likely isn’t a feasible option for most.
If we hadn’t gone the aluminum route, we would have built the frame from either treated lumber or bought a greenhouse kit.
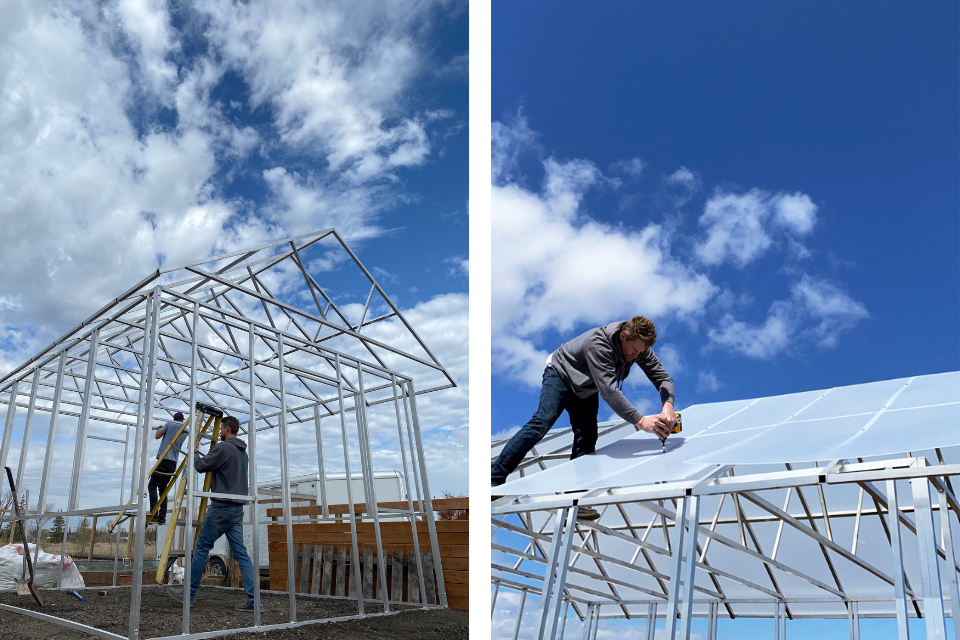
If you’re considering buying a greenhouse kit, I’d highly recommend Planta Greenhouses as mentioned above!
They carry a huge variety of greenhouses sizes as well as most of the supplies you’d need to build your own DIY backyard greenhouse, including automatic roof vents, polycarbonate sheets for your greenhouse walls and shade cloth.
We specifically selected aluminum as we knew it would be extremely durable and hold up throughout our extreme Manitoba winters for the next 10+ years (hopefully!).
For our greenhouse frame, we first welded it in four sections, allowing us to have lots of support throughout the roof.
To save some money on the overall cost of building our backyard greenhouse, we sourced windows from family, friends and by searching Kijiji & Facebook Marketplace. And to our luck, we found 16 single pane windows for free!
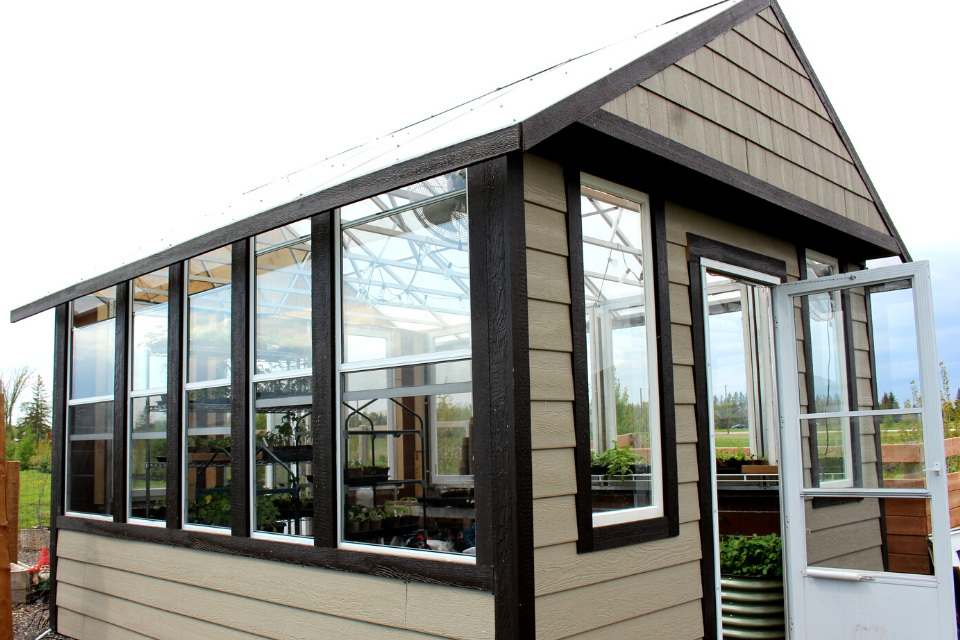
We prioritized air flow and ventilation, this is key for a DIY greenhouse build.
We chose windows with screens to allow for more air circulation to flow throughout the greenhouse. We also bought two screen doors, one for the front and back, at a discounted price. We designed the greenhouse so you could walk right through it directly into the garden.
Then to increase air flow further, we installed two greenhouse-quality fans (also purchased used!) in each corner. We also installed a 2-in-1 Phoenix Greenhouse Heater & Cooler, which works great for keeping our greenhouse warm in the early Spring when seedlings are germinating.
The biggest expenses were not essential for a DIY greenhouse but “nice to haves.”
One of the bigger expenses was trenching a line underground to run power and water into the greenhouse.
We had to rent a trencher to do this and hired an electrician for the electrical.
The other major cost was the roof panels and siding. The siding was completely for aesthetics as we wanted the greenhouse to match our house.
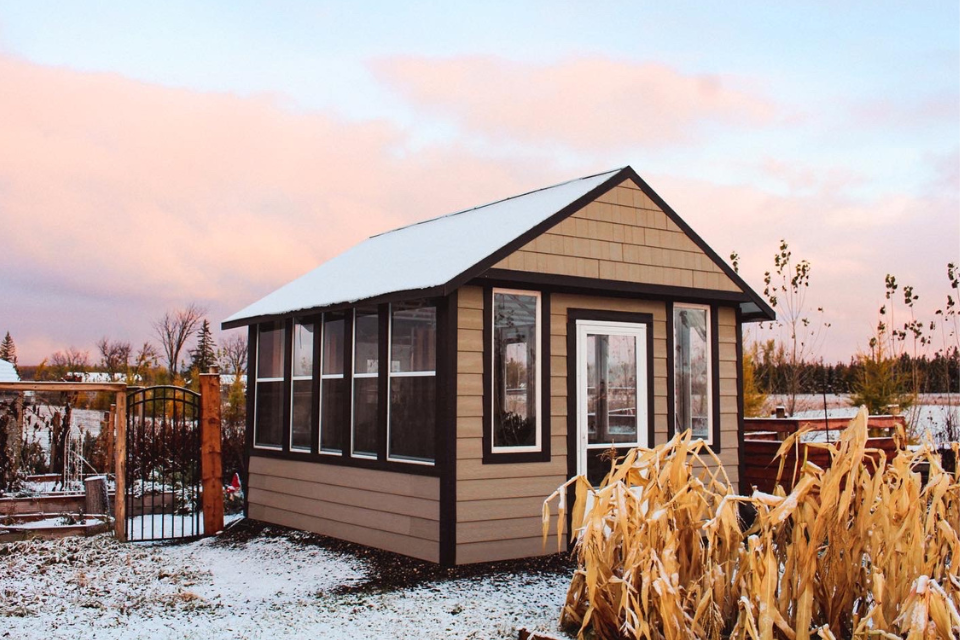
Greenhouse polycarbonate sheets range in price depending on the thickness you select.
How Much Does It Cost Do Build A Backyard Greenhouse
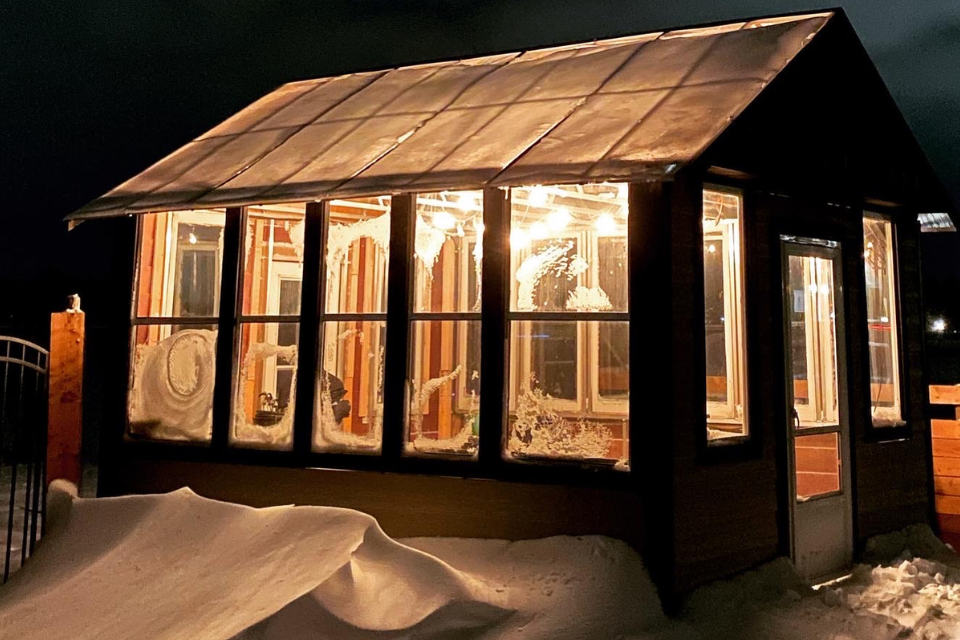
I’m sure most of you are wondering this! And I don’t blame you.
Let me first say, we knew we didn’t want to try and cut costs with this greenhouse. Our first greenhouse was very much low cost, DIY.
But since one of our objectives was to build a greenhouse that could suit our needs for the next 6-10 years, we wanted to make sure we did it right even if that meant spending a bit more money.
So, overall with the cost of materials and labour (not including our free labour), I’d estimate our greenhouse cost about $6,000 to build.
Here’s the estimated cost breakdown for building our DIY greenhouse:
- Aluminum — $750.00
- Black Gravel (for base) — $500.00
- Windows — FREE
- Screen Doors (2) — $100.00
- Roof Panels (8) — $1,000.00
- Exterior Siding — $2,500.00
- Trenching Power/Water Lines — $1,000.00
Total cost for our DIY greenhouse = $5,850.00
Alright, enough about the technical stuff.
You’ve waited long enough to read my best tips for building a DIY backyard greenhouse for cold weather climates. So here they are!
8 Best Tips For How To Build A DIY Backyard Greenhouse

1. Design your greenhouse based on your growing goals
I mentioned this above, but it’s worth stating again because it really is so important.
If you don’t know what you want to grow or use your greenhouse for, I can confidently say it won’t be worth the work it takes to build.
Start by asking yourself these questions:
- How many months of the year do I want to use my greenhouse for?
- What type of foods/flowers do I want to grow in my greenhouse?
- What is the minimum & maximum temperature I want my greenhouse to get to?
- How will I grow plants in the greenhouse? ie: in containers, raised beds?
Be realistic with your goals. For myself, living in a Zone 3 climate where our Winters can get as cold as -35°C, I knew it wasn’t realistic to try and grow food in my greenhouse from December-February. I also didn’t want the added cost of heating it during those extremely cold months.
So, start by outlining your goals and then design your greenhouse around them.
2. Select a location with full-sun
This may seem obvious, but the sun is one your greatest tools…especially for cold weather greenhouses. Use it to your advantage!
Even on bitterly cold Winter days here in Manitoba, if the sun is shining our greenhouse will heat up 10-15°C warmer than it is outside.
So how do you select a full-sun location? Full-sun is considered 6-8 hours of direct daylight. As the days get longer in the Spring, start monitoring the area you’re considering putting your greenhouse. Check when it gets light throughout the day, at what times of day it gets shade (if any) and for how many hours.
You may be surprised by how little or how much sun a certain area of your property gets once you really start paying attention.
3. Prioritize ventilation

If you only take one piece of advice from this article, let it be this! Ventilation is key in your greenhouse.
You need to have a way for hot air to escape. Ideally, this would be a vent placed in the top corner of your greenhouse or roof panels that open. Other ways to ventilate your greenhouse are screen windows, doors you can keep open during the heat of the day and electrical fans.
Depending on your greenhouse design, you can also have hot air escape from the bottom walls of your greenhouse. This works well with hoop house designs where the poly can be rolled up from the bottom.
4. Have access to water & power
To keep your plants happy, you’ll want to be able to easily have water and power access.
For water, it can be as simple as running a long hose to your greenhouse or you can get more elaborate like we did and trench a water line. Either way, be sure you can easily access water in your greenhouse. You do not want to be hauling watering cans and buckets of water from your home. It’s just not a sustainable way to garden.
When it comes to power, this really depends on your growing goals. If you want to keep your tender seedlings in your greenhouse early in the Spring, you’ll likely need to have an electric space heater running during the night. If your goal is to grow tomatoes and cucumbers in the greenhouse during Summer, you might be okay without having power access.
Again, it comes back to your gardening goals!
5. Use materials that absorb and retain heat
This is a true cold weather greenhouse hack! You can find a lot of cool DIY ways to retain heat in your greenhouse without using power.
In my greenhouse, we built a 6 inch base of black gravel to build our greenhouse on. The black gravel absorbs sunlight and stores heat throughout the night. We’ve found it’s actually made a big difference during the shoulder seasons.
But I’ve come across many other wild ideas online of how gardeners are heating their greenhouses, such as keeping their hens in the greenhouse to generate heat from their bodies. Crazy!
Another less wild but effective idea is to place black rain barrels full of water inside your greenhouse. The barrels heat up from the sun and generate both warmth and humidity in your greenhouse. Of course, this is a concept that can only be utilized when temperatures are above freezing.
I’m sure you can come up with even better DIY ideas for your own greenhouse.
6. Choose materials with high R-value
R-value tells you how well a material is insulated to prevent the flow of heat from leaving your house, or in this case greenhouse. It’s essentially the measurement of a materials’ ability to resist heat flow.
Depending on where you live, you’ll need different R-value materials for your greenhouse if you plan to use it in the cooler Spring, Fall and Winter months.
A material like greenhouse poly has little to no R-value and won’t provide any insulation for your greenhouse. A material like single pane glass windows has a bit more R-value. But a material like spray foam insulation has a lot of R-value and will prevent heat from leaving your greenhouse almost entirely.
You’re probably not going to insulate your entire greenhouse with spray foam. But you can strategically select different materials with various R-values to maximize heat retention.
For example, my greenhouse has a mix of single pane windows, plywood and engineered wood siding. All materials have varying R-values.
7. When possible, source commercial greenhouse-quality materials
There’s many commercial greenhouse supply shops that will sell direct to consumers. I’d recommend buying some of your materials from here! It guarantees your greenhouse will be good quality and able to withstand cold weather.
As I’ve already mentioned throughout this post, I’d recommend purchasing your supply via Planta Greenhouses Canada.
Though they are more expensive than greenhouse material sold at local hardware stores, they come with a 10 year warranty and are virtually unbreakable. We felt like it was worth the investment!
8. Strongly secure your greenhouse to the ground

My last tip is one that shouldn’t be forgotten! Secure your greenhouse to the ground so it can withstand Mother Nature during all 4 seasons.
If you’re building a greenhouse using poly, it essentially becomes a big tent that can easily lift up and away if it isn’t secured to the ground. If you’re using glass, polycarbonate or other more durable materials, it’s still a good idea to secure your frame to avoid it from tipping over.
For both of our greenhouses, we used rebar hair pins to secure the perimeter of the frame to the ground. Using a sludge hammer, we pound them into the ground, spacing one hair pin every 2-3’ apart.
We live in a very windy area with little tree protection and have found the rebar hair pins work great!
And there you have it!
Those are my top 8 tips for building your own DIY backyard greenhouse.

I’ve walked you through the evolution of our greenhouse building experience. From building a small, poly-frame greenhouse to years later custom building the greenhouse of our dreams.
If we can do it, you can do it.
With a little research and planning, you can easily build a DIY backyard greenhouse for cold weather climates. I believe in you.
To see more of our greenhouse and what’s growing in it, follow me on Instagram @fromsoiltosoul and Tik Tok. You can also browse my other blog posts for more organic gardening advice.
And if you have any more greenhouse building questions, leave a comment below. I love chatting with you here and answer every comment!

LOVE all your tips. We have lived in Manitoba but are in Prince George now. Built our greenhouse out of salvaged double pane windows against the south facing wall of our garage. Fans for ventilation are an absolute MUST. Heat retention overnight, particularly on spring and fall is also huge. The black water barrels we use work great to help modulate the temperature. If I had it to do over, I would have less glass on the roof and a solid insulated roof on the upper half of the roof.
We are hoping to add a water catchment system from the roof into the greenhouse to cut down on city water usage.
The other thing I would say is build it bigger than you think you will need, if possible. I wish I had space to have a little table and chairs to sit and have coffee or even a nice dinner.
Hi,
Last year I bought a used greenhouse, and quickly discovered that it would heat up beyond the temperature needed for many plants. I do have a reverse fan and a few vents, but this year improving ventilation is a priority.
Thanks for your tips on this. Question one..what’s your take on shade fabric, or reflecting shade fabric?
Second question. I have started seeds inside using heat mats and grow lights. Is it possible to start seeds in a sunny location inside my house, without using grow lights and mats..and then transfer to greenhouse when they’re sprouting?
I love your website and will now sign up for your other communications.
Julie
Hey Julie! I love shade cloth and have ours up in the greenhouse throughout most of July & August, it helps a ton! I would highly recommend especially if your greenhouse is in direct sunlight. In regards to seed starting, you’ll likely find your seedlings will get leggy if they’re not under grow lights as they’ll be “reaching” toward the sunshine. So while you can and you’ll probably have some success, you might not find your seedlings look all that happy. But always worth experimenting with!
Hi Maggie
I’ve been thinking, sketching and calculating for my new greenhouse. I just read your blog. It is great! Thanks for putting your experiences into words for us!
During covid I built a poly greenhouse over a Costco temporary car cover. The darn thing is still intact today. This year is my best ever, with dozen of pounds of tomatoes in 4 varieties!
It has solar power for an electric fence (bears), fans, auto operators for ventilation and it is tied it to my irrigation system, all in an attempt to be able to go hiking, biking, camping etc and NOT be tied to my greenhouse.
I am impressed with your writing and am hoping to start a new structure next spring. One of my goals is ‘cooling’ the greenhouse once summer (and global warming) hits. I’m working on less exposure, reverisible sunshades for heat absorbion and heat deflection , and even ‘ whirlybirds’ on the roof for more positive ventilation.
As a challenge I love the re-use vs buy- new where possible.
Your bog got me motivated……
Thanks Maggie
Hey Don! Thanks for the comment and excited for you and your new greenhouse build! I love your DIY tomato hot house…sounds like it’s definitely doing its job. The shade cloth has been the biggest aid in keeping the temp cool in our greenhouse so would definitely recommend, and even better if you can find a used/second hand one. All the best!
Thank you for this informative article! My husband is building a shop this spring and we plan on building a lean to style greenhouse on the south side of it taking advantage then of what will be the north wall of the greenhouse/south side of the shop. Do you have suggestions for size? My greenhouse goals are very similar to yours in that I want to extend my season but not heat it from November to March. Just hoping with hoop houses and row cover within it to keep greens going as long as possible and start earlier than May like in the raised beds outside. Our children are adults now so just the two of us to feed other than sharing extras. I’ve never had a greenhouse or cold frame to grow in for the 30 years of growing I have done. So any tips on beds in ground raised or containers and growing tips would be appreciated.
Thanks you I love the pod cast as well as your blog.
Happy gardening
Michelle
Hi Michelle, thanks for the comment! I love that idea, my husband and I always discussed this type of concept. My suggestion for size…if you can go bigger, do it! We are already feeling like we went too small at about 12×14. I’d love a bit more growing space to make it easier to transition from Spring to Summer growing. How it is right now, there’s a few weeks when it gets cramped with seedlings + our Summer greenhouse plants. Plus, always nice to have a little extra room for a table and chairs. I like growing most things in the greenhouse in grow bags as it allows me to be creative each season and change up the formation, however we also have a Sproutbox raised bed in the corner…so not sure there’s one right answer but more so what fits your taste/gardening approach. Good luck with the project!
Very down to earth and realistic. I live in northern Alberta and have been making hoop houses for long time for personal use. I found your info very similar to what I’ve learned and then some. Grow on. 😊
Thanks Terry! Appreciate the comment and wish you success with your garden.
Hello: Thank you for the wonderful collection of very helpful information. We livein Montana and last winter the temp got down to -45F for several days. Typical winter temperatures do drop down to -20Fto -30F. I have the most perfectly wide open south facing area. Actually it is wide open to the north and south with some western sun also. I have been wanting to build a greenhouse that will get us through the winter. Plan to use solar to heat–will also need solar panels for the electric fence! I have been toying with the idea of a tall roof with glass panels and then a second free standing building not as high or as tall underneath. It would be a greenhouse under a glass carport type of thing. My thought being we could use the extra protection and sun from the roof and the snow drop off would be several feet away from the perimeter of the interior greenhouse. My idea comes from Thorncrown Chapel in Arkansas. Of course there is too much wood detail in the chapel, but the idea of it being a tall glass roof with a smaller whole greenhouse underneath comes from here. Would love to have your thoughts. Here is Thorncrown.
https://thorncrown.com/photogallery.html
Hi Anne! How exciting, building a DIY greenhouse is such a big undertaking but an amazing project at that. I always say the same thing to gardeners when they ask for advice on greenhouse building, which is “what are your goals?” Do you want a space you can grow food in year round? If so, glass might not be the best material in terms of retaining heat. Plus with glass you can’t insulate…But if you are looking for a space you can use in Spring-Summer then a glass design could work well. I’d also suggest planning on the base on your greenhouse. What will it sit on? A concrete pad? Or the ground? These are all factors that will influence how much heat the building retains. Hope that helps a little bit! We are actually in the process of updating our greenhouse a little bit too to make it more Winter-proof. I’ll be sharing all the behind the scenes here, so be sure to follow along!